After you add pages to your WorkApp, create roles to control which pages different stakeholders can view and edit.
Permission levels in WorkApps roles are independent of the Smartsheet permission levels for collaborators on the source item. If you share a WorkApp with someone, you don't need to grant them access to each Smartsheet item contained in the WorkApp.
Here are some examples of how you might use this capability:
- Reveal different parts of a project to specific roles. You could create a role for Project Managers, which allows people in that role to edit the entire project plan and view the metrics dashboard. You can also create a separate role for Assignee, which hides the metrics dashboard and only allows the people in that role to edit a report that displays their assigned work.
- Give a user access to a report outside of Smartsheet. You can grant a user not shared to an Open Requests report in Smartsheet editor access to the same report through WorkApps roles. This collaborator can't see or interact with the report in Smartsheet, but they can access it in the WorkApp.
- Target work assignments Use the Current user filter on a report to set the page permission to Editor. The report displays only the rows that are relevant to the collaborator. The collaborators in a role with Editor permissions for the page can edit values in rows assigned to them in the WorkApp.
Create and edit roles
Only the WorkApp builder can create and assign roles for that WorkApp.
- Select the Roles icon
from the left rail.
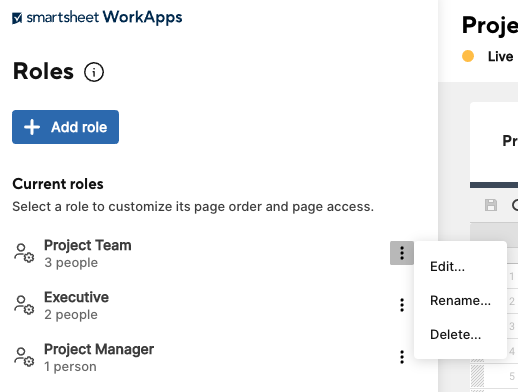
- Select Add Roles.
- To edit or remove (delete) an existing role, select the menu icon to the right of the role name and select Edit or Delete.

Settings for WorkApps roles

On the settings page, you can:
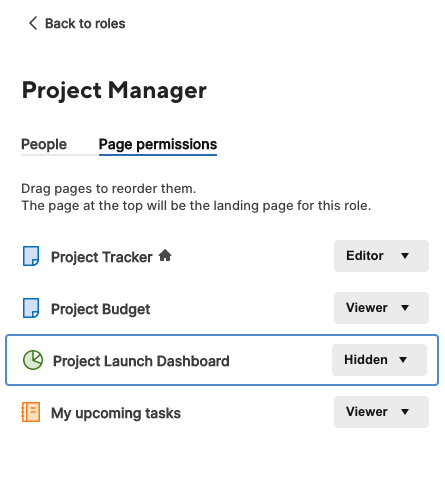
- Name the role by selecting the bold role name at the top of the panel.
- Add People to a role.
- View people assigned to a specific role on the People tab. Collaborators can have more than one role and can switch between those roles.
- Delete people you no longer want assigned to a role.
- Control role permissions for each page in your app.
- Arrange page order. Hover over the page name and drag it up or down the list when the drag icon
appears.
Page permission reference
As you create roles, you need to keep the page-level permissions in mind. As a best practice, give people the lowest permission needed while still providing access to the assets they need.
Role permissions are independent of the collaborator’s permissions on the source item in Smartsheet.
The following table outlines page permissions per role.
| Page permission | What people with this permission can do |
|---|---|
| Editor | An Editor can edit rows, cells, and add attachments. For dashboards, forms, and web content, this permission is the same as Viewer. |
Viewer | Viewer provides a read-only view of the page. Viewers can fill out forms, pages, and interact with web content pages the same way they would in a separate browser window. |
| Hidden | Hidden hides the page from collaborators. Hidden is the default permission of each page when you create a new role. |