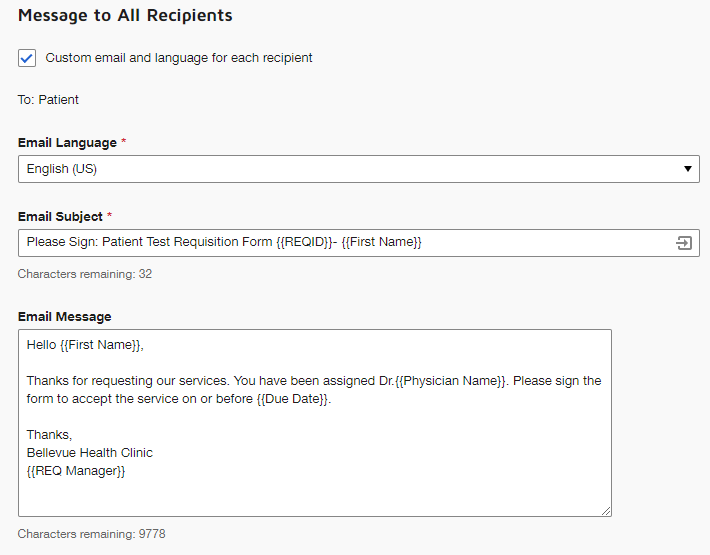
Use values from your sheet to customize the email subject and/or message.
Prerequisites
- You must be an Admin on the sheet to create new mappings.
- You must be an Editor on the sheet to use the mapping and send out envelopes.
- You need a DocuSign account to create mappings.
Customize your email
- Log in to DocuSign.
- Select your template and select Edit.
- Scroll down to Message to All Recipients.
- Use Smartsheet column values to customize the email subject and body message. Type the Smartsheet column names inside double curly braces and then type in the rest of the message.
For example: Contract for: {{First Name}} {{Last Name}}
Brandfolder Image

Preview the custom email message and body of the email from Smartsheet
- Go to Smartsheet, right-click on a row, and select Generate Documents.
- Locate your DocuSign mapping.
- Hover your cursor over the mapping and select the edit icon.
- Select Settings and then select Custom Email Messages.
- Preview your customized message.
This feature is limited to Send via DocuSign and doesn't work yet with Save as Draft in Docusign.