Tagging is a best practice and one of the fundamental steps to organizing your assets in Brandfolder.
Tags help to facilitate refined organization, discovery, search, and filtering of your assets. You can also leverage pinned tags to create reusable filters for commonly used assets.
Tag assets
Assets can be tagged within the individual asset modal or by utilizing the bulk toolbar.
For information on editing tags from Bulk Management, visit Bulk Management Tags.
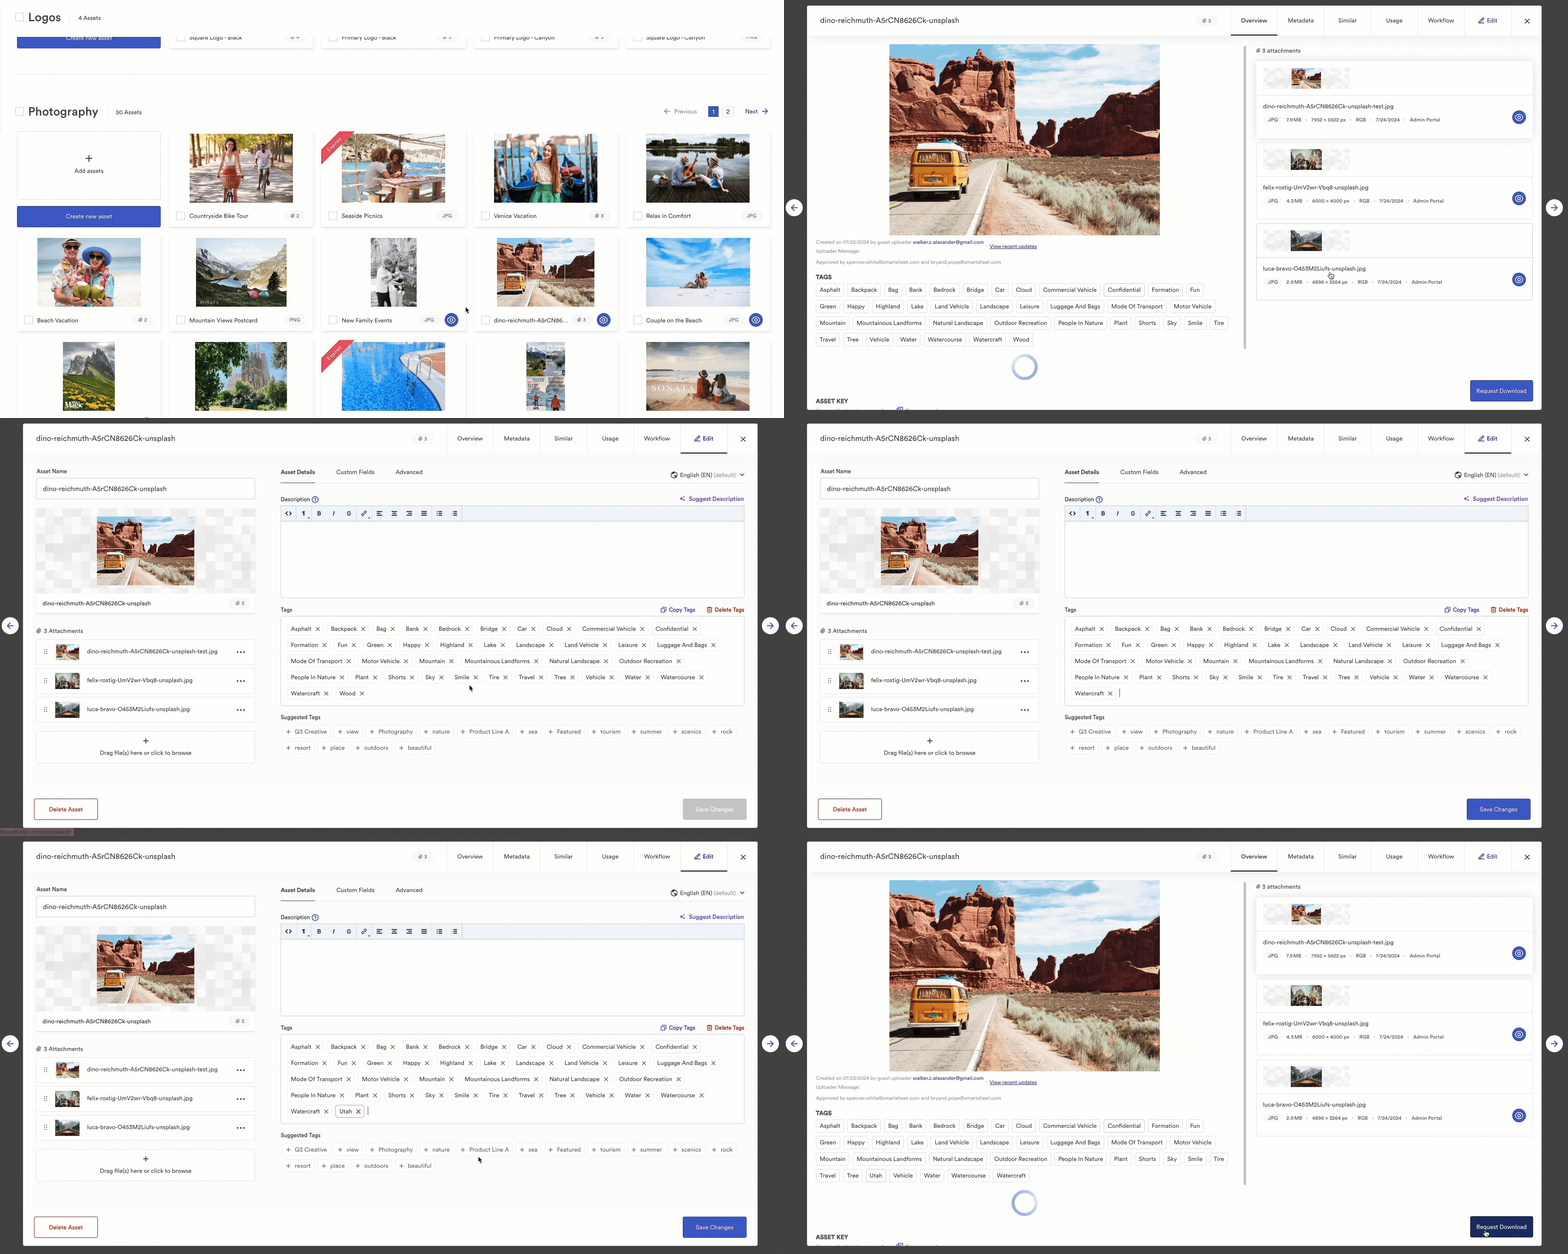
Individual Asset Modal
- Open the asset. Navigate to the Edit tab.
- In the tags area, add a new tag by typing it into the box and hitting enter. Select the x next to the tag if you wish to remove a tag.
- Select Save Changes.
- Brandfolder Image

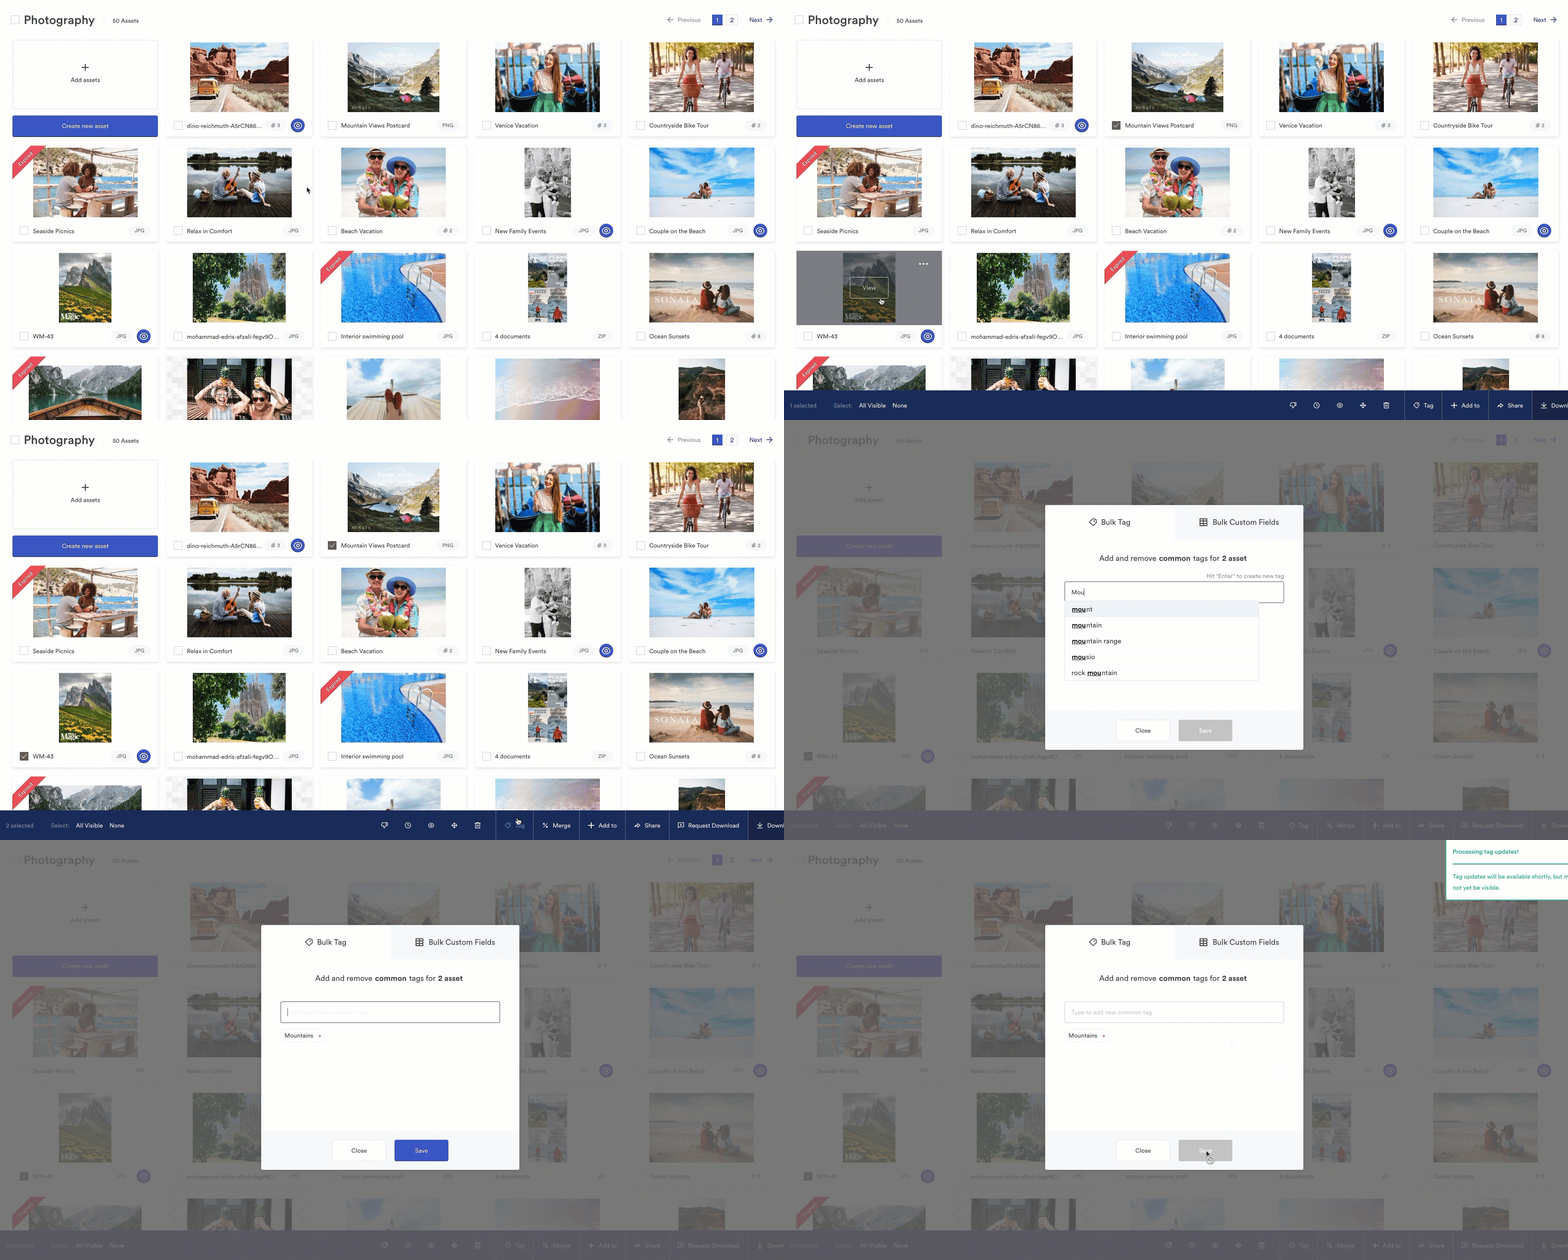
Bulk toolbar
- Select the assets you want to tag using the bulk selector checkbox.
To tag an entire section, select the checkbox next to the section's name to tag a whole section.
- Select Tag from the Bulk Actions menu.
- In the new modal, type in new tags (hit enter to create a new tag). Select the x next to the tag to remove tags from multiple assets.
- Select Save.

Auto-tagging
Brandfolder can utilize tags generated by Google's artificial intelligence. When you enable this feature on your Brandfolder, the system analyzes the asset and applies tags based on what is in the image. The automatically generated tags have a dotted border, while the manually added ones have a solid border.
To toggle this feature on or off, navigate to Settings > General Settings > Advanced. Here, you will see the option to turn auto-tagging on or off.